- Joined
- Jul 3, 1997
- Messages
- 66,709
- Real Name
- Ronald Epstein

The Perfect NEST For The Home
Review by Ronald Epstein
July 2014
I have been wanting a Nest thermostat ever since it was introduced to the market in 2010 by Apple engineers Tony Fadell and Matt Rogers. These were two guys who who were unimpressed by the herd of thermostats that were available on the market and ventured out to make one of their own. This was the birth of Nest Labs, which was acquired by Google in January of 2014.
As I noted, I really didn't need a new thermostat. I actually had a really great Honeywell unit that had been serving me quite well for the past year. So, when the folks at Nest offered a unit for me to review, I began giving myself as many reasons as I could to make the switch. The biggest benefit I saw in the Nest was its ability to connect to the Internet, thus allowing its owners to remotely monitor, set and schedule cooling and heating within their home. For a gadget freak like myself, this was the ultimate toy to try out.
The one thing that worried me more than anything else, was installing this thermostat on my own. I have no expertise in wiring or even drilling holes in the wall. The thermostat I owned was installed by an electrician. For me to even attempt to try this solo, was a very scary proposition. However, I was amazed at the amount of information available on the Nest website, which included video tutorials on how to properly install the device. There's even an online system match that uses checkboxes to determine if the wiring in your home is compatible. After spending about 20 minutes looking through all the website material, I felt rather comfortable that I could install this on my own and not screw it up too badly.
I'll talk more about the installation process in a few moments, but first want to give you a rundown of the Nest thermostat itself...
The Nest Thermostat Unboxing


Unboxing the Nest, you sort of feel as if you are opening an Apple iPhone. Elegantly packaged, and with everything you will probably need to install (including a screwdriver), nothing about this product seems "cheap" nor conveys any sort of intimidation about its installation.
Out of the box, the Nest thermostat feels like something quite remarkable. It has a wonderful glass and aluminum quality to it, and you can see that it's the kind of fixture that is going to get second looks by family and friends who happen to walk by it.
The Nest Thermostat Installation
My goal was to get this installed in under 30 minutes. As someone who was the furthest thing from a home remodeler, I knew that not calling in a professional electrician might be a huge mistake. Still, on the surface, it looked as if this wouldn't be a difficult install.

The most important thing I recommend to everyone before even purchasing a Nest, is to check the wiring on your current thermostat. The Nest works in 95% of homes with low voltage systems.

To show you just how easy it is to wire this thermostat, you simply take pen and paper and copy down the letters corresponding the wired connections in your current system. Go to the Nest online compatibility system check (halfway down page) and put checks next to the corresponding letters. The result will be a custom wiring diagram that you can print and use to rewire theNest. There are even peelable stickers provided in the box that allow you to effectively label your wires for easy reference.

After turning off the circuit breaker to my furnace, I unwired and unmounted my Honeywell thermostat. I saved the original large mounting plate because of the amount of unfinished wallpaper beneath it. That forced me to have to put the included Nest trim plate on top of it and then using dry anchors that I purchased, screw the wiring base into that plate. Did you notice the leveling bubble tool built into the base? Pretty neat!
Good spot in the review to point out that the Nest has a rechargeable Lithium-ion battery built into the unit and is constantly recharged by the power it receives. As thus, no need to install batteries.

I would have loved to have done a trimless install, but I don't have a clean fully-wallpapered wall to do that upon. Once you wire the new base, you simply snap the Nest into place. Turn your power back on, and the Nest comes to life.
By the way, it took me about 20 minutes total to install the Nest, and that is with difficulties I had using my original mounting plate and placing the new trim plate above it.
Setting Up And Using The Nest

The initial setup of the Nest is very similar to turning on and setting up a smart phone. The first thing the Nest looks for is your home network. Through a combination of turns and presses, enter a password and you're connected. In most cases, your Nest will immediately search for, download, and install an initial update to its system. The great thing about having Internet connectivity is that all firmware updates are delivered directly to your device.
The next few steps are designed to establish the type of heating system your home has (Gas, Electric, Forced Air), as well as the lowest and highest temperatures you would like to set Nest for while you are away from home.


The Nest has a wealth of settings that can be accessed through various turns, clicks and presses. It's rather easy to navigate through and there's little chance of making any mistakes as you always have the option to cancel before committing to a new setting.

As you turn the nest higher and lower, the face color changes. Orange indicates higher heat settings while blue shows lower cold settings. An indication of a green leaf indicates conserve settings, which may help you save money. The most important thing to know about Nest is that it is a learning thermostat. In fact, it's constantly in learning mode. Say for instance you wake up at 8am and lower the temperature to 72 degrees, then later in the evening around 10pm you raise the temperature for overnight, the Nest is going to eventually learn those settings and automatically adjust. It will take Nest a few days to learn your routine, but trust that it will.
In my case, I wanted to program a hard schedule into my Nest from the first day. The ability to create a daily/weekly schedule can be done on the thermostat itself. However, I'll admit that I didn't pursue that option because quite frankly, these eyes are getting a bit old to work with the small graphics on the display screen.
Fortunately, all the major settings, including scheduling, can be accessed in quite a few ways. You can log on to the Nest website with your browser, log into your account, and access your settings. There is also an app available for the iPhone, iPad, Android/Windows phones and tablets. It was the iPad app that I used to access my Nest and adjust its schedule. Let me show you some screenshots...


Using the scheduling tool in the iPad wasn't the most pleasant experience. It took a bit of finger sliding in two different directions to get the temperature and time absolutely accurate. The biggest problem I found is that there is no option to set a schedule for a single day and then have it repeat for the entire week. You have to set each day's schedule separately. Thankfully there is a cut and paste feature that allows you to easily copy from one day to the next.

For my schedule, I used the iPad app to schedule the Nest to start cooling the house to 72 degrees every morning at 1am. Since I go to bed rather early, I scheduled the temperature to go into a savings mode of 75 degrees at 4pm. Those iPad settings were easily confirmed on the Nest thermostat immediately after input.
Of course, the biggest reason for wanting remote connectivity to your thermostat is for those times you go away for an extended period of time and want the peace-of-mind of knowing what your thermostat is doing. Forget to change it before you left the house? You can adjust the temperature from your computer, Apple/Android/Windows/ device anywhere around the world at any point in time.
Ease of Use and Energy Savings
You can tell that the Nest was created from engineers from Apple. It's as easy for anyone in your household to use as an iPhone would be. The thermostat remains completely dark, that is until you approach it and its sensors pick up your presence to light up its display. A simple turn of the dial in either direction will raise or lower the temperature. We did find that the sensor was not very good at sensing an approaching person. This seems to be a common problem from other reports I have read. These same sensors can tell how much traffic is going on within the room. When it senses no movement over an extended period of time, it will determine that you are on vacation and switch itself to away settings. Again, the Nest is always learning.

After approximately 10 days, you will have the ability to receive your first report on your Energy History. The history shows you how long your heating or cooling system has been running. In turn, this can assist you in making smart energy saving choices about your scheduling. For instance, the blue bars above represent cooling (red for heating), and how many hours my system was active during the day. Whenever a leaf icon appears, it signifies the fact that I have saved energy for that day. Additional icons represent reasons for energy savings such as Auto Away, Weather or Adjustments.
Logitech Harmony Ultimate Remote Control Integration
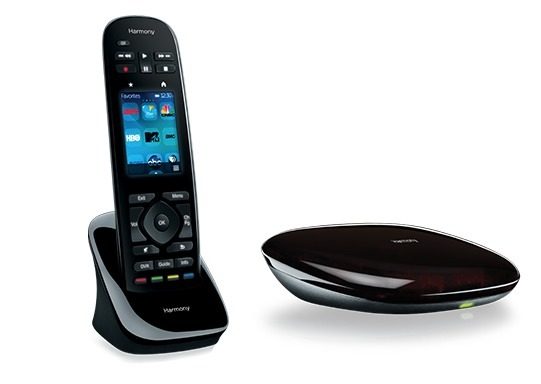
For those of you seeking to integrate the Nest with your home theater remote, look no further than Logitech's Harmony Ultimate remote. It allows you to control the temperature of your environment directly from your favorite chair without having to get out of your seat.
CONCLUSION
At the time of writing this review it seems that the price of the Nest Thermostat has been relaxed somewhat. This makes its purchase somewhat more tempting that it had been previously. Still, make no mistake about it, the Nest is a luxury item that costs about 5 times more than most standard thermostats. That being said, I believe that this thermostat lives up to its price tag. It's made of quality metal and glass construction. It's also basically a "set it and forget it" device whereas you manually change the temperature in your home over the course of the day, it begins to learn your lifestyle and programs itself. Of course, with access to your thermostat from a PC browser or mobile app, you can control the temperature from anywhere in the world. Just imagine coming home from work on the bus or train and being able to use the app to warm up your home before walking through the door. There's something to be said for that kind of convenience.
The only problems I saw with this device was the proximity sensor that didn't always wake the nest as you approached it. There were a few times I had to wave my hand in front of the sensor to activate the screen. Also found programming the Nest on my iPad was not as smooth as I would have hoped. Programmers really need to concentrate on making that experience more fluent for the end user.
Final Word: I am thrilled with this thermostat. It certainly lives up to its hype.
")
