What's new

Ported Tumult Build (1 Viewer)

Mattak

Stunt Coordinator
Joined
Dec 15, 2003
Messages
247
Some pictures of my ported tumult progress so far. Specs are ~4 cubes tuned to ~24hz

Pictures

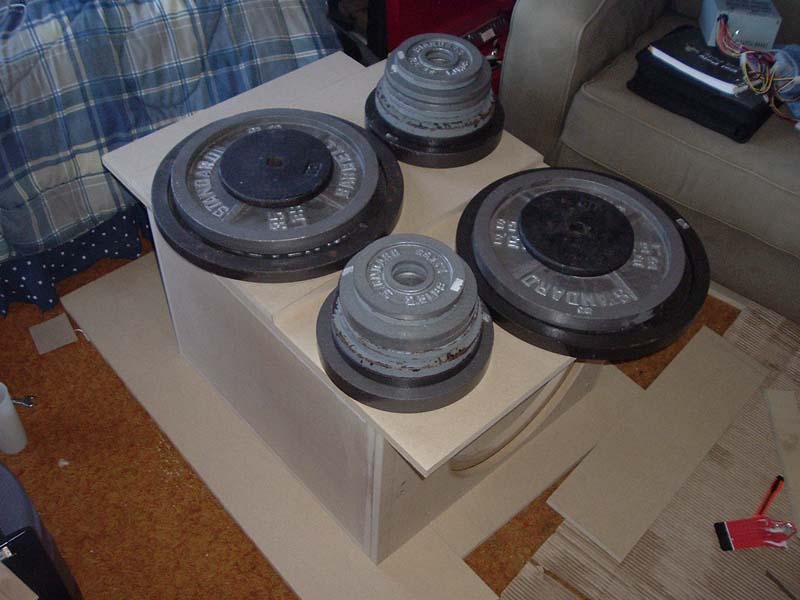
My custom veneer press :D


I'm not sure what the deal is, but I get some bubbling in the veneer, that's why I'm using the weights to try to keep this from happening. I'm using DAP Weldwood original contact cement (not water based), two coats on each surface applied with a roller. I follow the directions to the T and use a small wood block to put as much pressure as I can sliding it along. Everything seems to go smoothly until a while later I notice some bubbling. Looking back, I think I've been putting it on excessively thick, perhaps. Maybe too thick = too much evaporating gas = bubbling? The last time it happened, though, was about 6-7 days after applying, and it seemed much more due to the veneer absorbing moisture and warping. Lesson learned, I guess - I won't be buying relatively thick "raw" veneer if there's ever a next time.
 

Bob Kavanaugh

Second Unit
Joined
Jan 17, 2003
Messages
282
A wood block isn't going to give you the kind of pressure you want to get your veneer to stick and all of the air pockets out. I suspect this is your problem.

Applying it too thick is also a problem. Just a thin coat on each surface, let it dry to a tacky state, then use a roller from the middle out to get a good bond, and rid of the air bubbles.

Of course it could be that you're using contact cement inside, and it's altered your thought process :D

I hope it all comes out looking and sounding like you want. :emoji_thumbsup:
 

Mike Keith

Second Unit
Joined
Jan 24, 2002
Messages
324
Two coats seem like too much to me. If you wait until the coats are dry to the touch then apply with a roller (rolling pin will do) then you should not get any bubbles. My guess is that you used too much glue, you only need to completely cover each surface, and the glue must stick to the surface and be nearly dry before contact, then apply pressure. Pretty much what Bob said..
 

Mattak

Stunt Coordinator
Joined
Dec 15, 2003
Messages
247
The wood block actually seemed to work fine, I never had any pockets immediately after, it took a while for them to form. But, just for good measure I'll pick up a roller to give me some better pressure. I guess my reason for putting it on thick was because the edges of the mdf really sucked up the first coat, and I still believe they need two coats, but I'll try just one for the rest of the panels.
 

Eric Ha

Stunt Coordinator
Joined
Sep 27, 2004
Messages
146
When I got my veneer from Tape-Ease, their instructions said NOT to use a roller. I did anyway, I got bubbles though :-7 From their website:


Veneering Tips Using Contact Cement:

Cut with straight edge and utility knife or scissors
Prepare to glue your veneer with contact cement. Make sure substrate is free of dust and particles. Lumps will show up. Pre-fit all pieces prior to contacting, use reference marks to line up veneer, always cut veneer to hang over and trim off later. On raw wood, always seal the surface prior to contact cementing with a sealer or contact cement.
We do not recommend water-base contact cement with veneer. Use solvent-based and we have found that any brand has been good.
Use a scraper such as a edge of hardwood, not a j-roller. Scrape the veneer after contacted from the center to the outer edges. You can trim veneer edges with the grain with a VIRUTEX Double Edge Trimmer. And across the grain with a utility knife. Sometimes cutting from the back works also.
10mil is the standard in paper-backed veneers and works very well.
NBL Veneer or 2ply is a higher quality and has less chance of common problems occurring.
Use thin wood lattes to hold veneer away from substrate when applying.
Practice on scrap pieces first.
Be very careful when sanding not to sand through the veneer.
Use the right tools for the job. Contact Cement Roller Covers work well and fast.
 

Bob Kavanaugh

Second Unit
Joined
Jan 17, 2003
Messages
282
OK then, have fun with your bubbles. Truth be told, contact cement is a terrible choice for veneer. Titebond cold press is the ticket.
 

Mattak

Stunt Coordinator
Joined
Dec 15, 2003
Messages
247
Hey, no need to be a pretentious ass about it. I suppose you know better than a company that specializes in veneer, then?

Titebond is water based, no? Water warps the sh$% out of my veneer...not something I feel like dealing with. And since when is contact cement a terrible choice for veneer?

The arrogance of some people on audio boards never ceases to amaze me. Why even bother "helping" if it's such a stress for you.
 

Eric Ha

Stunt Coordinator
Joined
Sep 27, 2004
Messages
146
"Bob Kavanaugh, Veneer Pro"

You should print up some business cards. People will be impressed.
 

John t.

Agent
Joined
Apr 13, 2005
Messages
26
It is ok to apply two coats of contact cement. But you have to let it dry until it becomes transparent (glossy). It usually takes about 1/2 of an hour or more. Then you can put the veneer and apply pressure with a wood block.

I think this might be your problem.

If you put the veneer too soon, the parts where the contact cement hasn't dried, won't bond very well, creating therefore, the bubbles that you are getting.

BTW, nice box. Can't wait to see the finished product.
 

Joey Skinner

Second Unit
Joined
Sep 12, 2003
Messages
339
I've had no problems with contact cement and veneer. I use two coats on both pieces, let it dry, apply the veneer and press it down using a wooden rolling pin (use a scraping motion, don't let it roll). If you do a good job with the initial placement of the veneer it should press down easily and be stuck fast. Disadvantages, it is smelly, messy and unforgiving. I've also use the iron on glue method.
Many people swear by this method(excerpt found in Bob Kavanaugh's links above):
"You can also use the iron-on process. Both the back of the veneer, and the plywood substrate are coated (with a brush) with a 90/10 solution of tightbond wood glue and water. This mixture is allowed to nearly dry, then the veneer section is ironed onto the plywood. This is a tedious process, but will result in the strongest bond available withought a bag press. Used by speaker cabinet makers for years."
 

Mattak

Stunt Coordinator
Joined
Dec 15, 2003
Messages
247
Hi Joey,

So far so good on this box using contact cement. I tried the iron on wood glue in the past, but I used elmers carpenter's glue (yellow). I didn't thin it out, and I only put on one heavy coat on each piece, and I ended up with poor results. I apparently didn't use enough glue, since I couldnt' get it to stick down everywhere. In the process of trying to get it to stick I ended up discoloring the veneer with the heat...not horribly, but it made a noticable darkening in that side of the veneer.

I'll have to give other methods a try in the future. The cold press method seems to be what people suggest at the links Bob suggested, but this method seems to have drawbacks as well, especially when doing large speakers...need lots of clamping, materials to act as the press, etc.
 

Mattak

Stunt Coordinator
Joined
Dec 15, 2003
Messages
247
Well, so far so good. 3 coats of deft clear wood finish lacquer on and it's looking great :)
 

Rob Formica

Stunt Coordinator
Joined
Feb 20, 2003
Messages
225
Far from being an expert myself... veneering isn't as easy a job as many would be lead to believe. I think most methods have the positive and negative points.


After having had several people I know running into problems (bubbling from water evaporation) with the iron on tightbond method... I came across several posts on woodworking forums recommending contact cement with the wood block.

Vacuum press seems to be the most recommended technique, but who could afford the expense for the occasional project?

Mattak, have you gotten rid of the bubbles you got... or they settled on their own?

From what I've read, there is no right of wrong answer.
Rob
 

Mattak

Stunt Coordinator
Joined
Dec 15, 2003
Messages
247
Rob,

I haven't experienced any bubbles on this project. I was speaking of my last veneering experience using the same veneer & contact cement. This time I tried as hard as I could to put a lot of pressure on the surfaces after applying the veneer. I used a smaller wood block than I did before to achieve more pressure per square inch, and each time left it overnight with the weighted board on top of the freshly veneered surfaces. I also picked up a small roller and used that after the wood block. It's a small, hard rubber roller which seemed to work well.

Now I just need to perfect the application of 3 coats of lacquer...it gets really hard to apply the 3rd coat without any runs/drips on the vertical sides :b
 

Mattak

Stunt Coordinator
Joined
Dec 15, 2003
Messages
247
All done, more pictures posted on at the original link. I'm very happy with the outcome :D
 

Rob Formica

Stunt Coordinator
Joined
Feb 20, 2003
Messages
225
Looks good... I really like the folded slot port. If I were to build another box sub, I'd do the same.

BTW... You built it entirely in you bedroom? That has got to get dust in all the wrong places... :crazy:
Rob
 

Mattak

Stunt Coordinator
Joined
Dec 15, 2003
Messages
247
haha...no, just the gluing, veneering, and lacquering, and some light sanding and drilling. Everything else I do outside...no garage :frowning:
 

Users who are viewing this thread

Sign up for our newsletter

and receive essential news, curated deals, and much more


You will only receive emails from us. We will never sell or distribute your email address to third party companies at any time.

Latest Articles

Forum statistics

Threads
357,016
Messages
5,128,519
Members
144,245
Latest member
thinksinc
Recent bookmarks
0
Top