Here's a diy I've been kicking around, budget sonotube towers for my office:
supplies: 12' of 18" sonotube $50 1 Dayton 18" 4 ohm classic subs $115 1 300w Bash plate amps $100 2 4" pvc pieces 8" long each (not sure pretty cheap) 1 4x8 sheet of 3/4" mdf $30 paint and miscellaneous $20
9-ish cube net sonotube tower (65") sub on the bottom mounted in mdf rings firing into an mdf base with 6" of clearance 2 ports and the bash mounted in the top mdf piece.
9 cubes at 26hz each. Should basically crush anything you can buy in that price range and well beyond. Unfortunately, you would have enough supplies
to do another for just the cost of the amp and woofer and ports because you are
from research i found out that adding right amount of polyfill (1-1 1/2 lb per subic foot) can help in sealed enclosure and will make it sound as it was actually bigger, thus lovering qtc. do i still need to line interior with sound dampening material though? or stuffing it with polyfill is all it needs?
Lining doesn't do much. It helps with full range speakers by absorbing some highs reflecting inside the box. Stuffing does help lower the Qtc. I get my poly from Wal-Mart in 20oz bags. You can also buy a polyfil pillow and just stuff it in.
i thought i would revive this thread and post some pictures from my first dyi subwoofer project
thanks again to everyone that helped.
used 3/4" mdf that i got in home depot. i didnt double any walls so the whole design fit on one 4x8 sheet. i dont own table saw so to ensure each two opposite sides are the same i cut 2 boards at time.
all pieces cut to size.
routing out window brace. the router i had was not plunge router so beginning of each cut was not that perfect, but it didnt really matter with this window brace
as i is hidden inside. also edge of circular hole for driver is covered with driver lip so no big deal. i was trying to be pretty exact but didnt hassle it too much.
all cut outs done. third one was for plate ampl
i first dry fitted before i glued. i also started with screws but i gave that up after i split two edges even after pre drilling. so i only have couple screws which made me more wwork covering the dimples.
complete enclosure. i sanded the hell out of it using 80 grit to get everything nice and smooth. mostly around edges and connections. i also lightly sanded edges to create slight chamfer
than i used spackling paste everywhere on connections and screw dimples. i had to do this several times as the spackling paste kept shrinking on me.
next time i would use something else. bondo or so. i think i did this 3 times, each time after paste got dry i sanded with 220 grit.
as a primer i used bim, shellac based primer. did two coats and spackled whatever little imperfections i was bothered with. than sanded with 220 grit.
followed with another 2 coats of primer and sanding.
final coat is krylon white gloss. i also purchased krylon clear gloss that i wanted to use as very top coat. after some tests i decided to use just white, as the results were pretty much same.
so i gave it 3 coats. that took whole can. than i wet sanded the hell out of it again. used 1500 grit.
i buffed the finish with car wax before photo shoot. the finish came out really nice. even my wife likes it. the can nicely reflects.
couple steps back, i installed spikes and cover frame inserts.
final step, i attached everything, wired and stuffed it with poly fill.
and complete
i added cloth cover but both my wife and me like it more without.
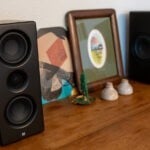
i just had my first home theater set up last weekend. i have this subwoofer paired with definitive technology speakers, 1000 for fronts and center and 800 side surrounds.
i am really impressed with the performance of this set up. i dont have any measurements it is just my impression. we watched avatar and t2 so far. i really loved
explosion in t2 when they blow out the research center dyson worked in. the whole house was rumbling
That looks great... you did some nice work there. Now give us the story to go with it. How did the build go? What was the process like for you? Are you happy with your desicions on box type, driver choice, amp choice? Any big surprises along the way? How does it sound? What are you most proud of? Are you going to be building more subs... or maybe some full range sets? Anything currently on the drawing board? What would you do differently next time?
It looks like basic Krylon rattle-can from Wal-Mart. I normally seal my MDF with sanding sealer before applying a high build primer from the automotive section at Wal-Mart. I've been using Rustoleum metalic paint lately. Charcoal gray or black is nice. I'm going to use some cobalt blue on some subwoofer frames before I assemble them.